EK2MFG Fuel Rail Adapter Kit
for the Mitsubishi 3000GT
and Dodge Stealth DOHC Models
by Jeff Lucius
Introduction
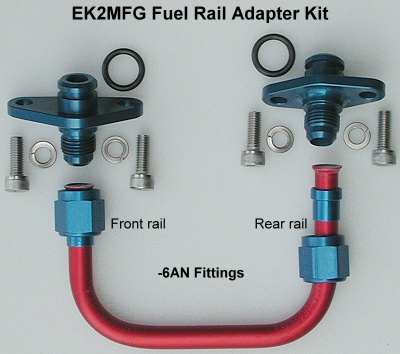
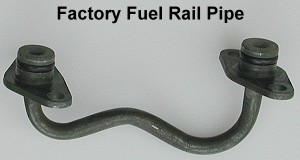
These instructions show how to remove the factory fuel rail crossover pipe and replace it with the EK2MFG fuel rail adapter kit. Bob Koch made this kit and sold it on eBay as seller jckbkoch. You can also buy the crossover pipe and fuel rail adapters direct from him. Contact Bob by email at ek2development at comcast.net . These adapters and some other EK2MFG products might be available at http://www.3sxperformance.com/. Bob has made some improvements in the crossover pipe since he made the model shown on this web page. The tube is now made of stainless steel, instead of aluminum, and he has changed the shape to better accomodate the stock intercooler hose and pipe. The factory fuel rail crossover pipe has a 1/4" outside diameter (OD), equivalent to a -4 AN pipe. The EK2MFG pipe has a 3/8" OD (-6 AN) with a nominal 5/16" inside diameter (ID). The factory fuel rails have an ID that varies between 5/16" and 3/8".
The tools required for this project include a Phillips screwdriver, 10-mm socket and wrench with a short "universal joint" extension, 10-mm open/box-end wrench, 5-mm hex key, -6 AN (or 11/16" open-end) wrench, and safety glasses. Please read all of these instructions before beginning this project. Depending on your skills and available tools, this project should take between 15 and 60 minutes.
Removal of factory pipe
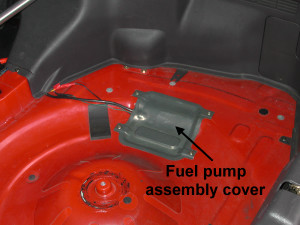
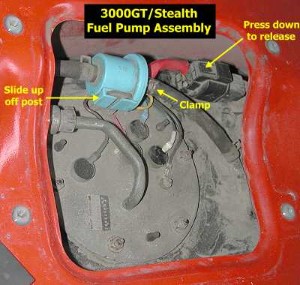
1. Relieve fuel line pressure. In the rear storage compartment, remove the carpet (velcro and push-in clips) and particle board floor (4 Phillips screws), or just raise these up out of the way. Remove the spare tire. Remove the passenger's-side storage bin (3 Phillips screws). Remove the access cover to the fuel pump (4 Phillips screws). Separate the electrical connector by pressing down on the tab and pulling that piece toward the front of the car. You do not need to remove the blue filter as suggested in the picture below. The wires shown running under the assembly cover are part of my fuel pump re-wire and are not present on a factory setup. Try to start the engine. It should not start because the fuel pump has no current to it. As a safety precaution, remove the negative cable from the battery. Be sure you have any security codes that might be needed when the battery is disconnected.
2. Move items out of way. Remove the PCV hose from the rear rocker cover and place or tape it out of the way. Disconnect the rear O2 sensor wire from its harness connector and place or tape it out of the way.
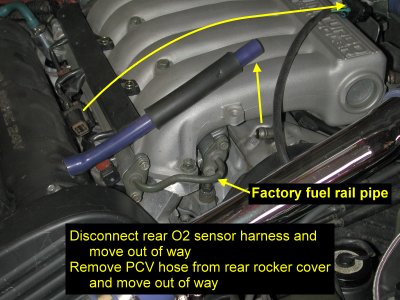
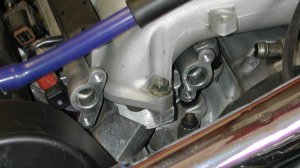
3. Remove crossover pipe. Place a rag under the crossover pipe to catch gasoline that remains in the rails and pipe. This gasoline should not be under pressure. However, as a precaution wear safety glasses to protect your eyes when removing the pipe. Because gasoline contains carcinogens such as benzene, avoid letting the gasoline contact your skin. Remove the four 10-mm hex cap screws that attach the factory crossover pipe. Just a 10-mm socket and wrench worked for the top two screws. I needed to add the universal joint extension for the lower rear screw, and use a 10-mm open-end wrench on the lower front screw. Pull the pipe away from the engine to remove it.
Installation of kit
1. Install adapters. Even a quick glance at Bob Koch's fuel rail adapters shows that these are little jewels. They are carefully and precisely crafted, and are anodized to the same color blue as typical AN fittings. They also fit perfectly onto the ends of the fuel rail. These fuel rail adapters make it simple to replace the factory supply and return fuel lines and the crossover pipe with aftermarket hoses and pipes that utilize AN fittings at the rail ends. Apply a very small amount of engine oil to the o-rings and roll them onto the fittings. Slowly and carefully press each adpater into the fuel rail. This may require a little bit of force. Note that the front and rear adapter are shaped differently.
Slide the supplied 1/4" split washers onto the supplied 6x1 mm socket head cap screws. Use these screws to attach the adapters to the rail. Be very careful to not drop these screws into the abyss under the rails and plenum. Start the screws several turns by hand then tighten using a 5-mm hex key wrench. Try to tighten the top and bottom screws evenly. If you are a real fumblefingers, tie a long string to the hex key wrench in case you drop it.

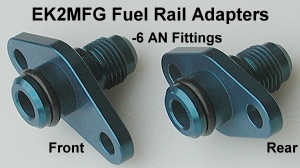
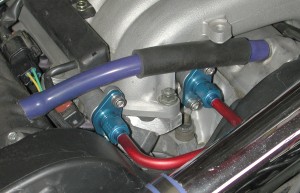
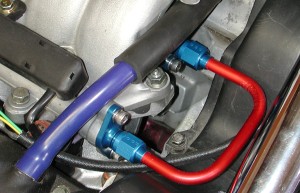
2. Add pipe. Fit the pipe to the adapters and hand tighten the AN sockets several turns. Note that the length of the rear "arm" of the pipe is longer than the front arm. The pipe I received was about 1/8" too wide overall. I carefully bent the ends closer. The bends in the pipe were no longer at 90º but it did attach correctly and did not leak. A tribute perhaps to the fundamental design of AN fittings with their 37º flare/inverse flare. It looks to me that this pipe could be made 1/8" less wide and maybe a not so long (length away from the adapters to the bends). Finish tightening the sockets with a -6 AN (or 11/16") wrench.
3. Replace moved items. Re-attach the PCV hose and O2 sensor wires.
4. Test. Plug the fuel pump harness back together. Put the negative battery cable back on. Start the engine and inspect the pipe and adapters for leaks. If leaking (mine did not), stop the engine, relieve the fuel line pressure, and remove and re-install the adapter kit. Inspect the o-rings and pipe flared ends for damage.
Page last updated June 26, 2005.


